

Part of the beauty in the Wholesale platform we created is the easy and efficient way we keep your purchases organized in one dashboard. In this tutorial, we will explore how to manage your various purchases, make edits, and print important documents for safe recordkeeping.
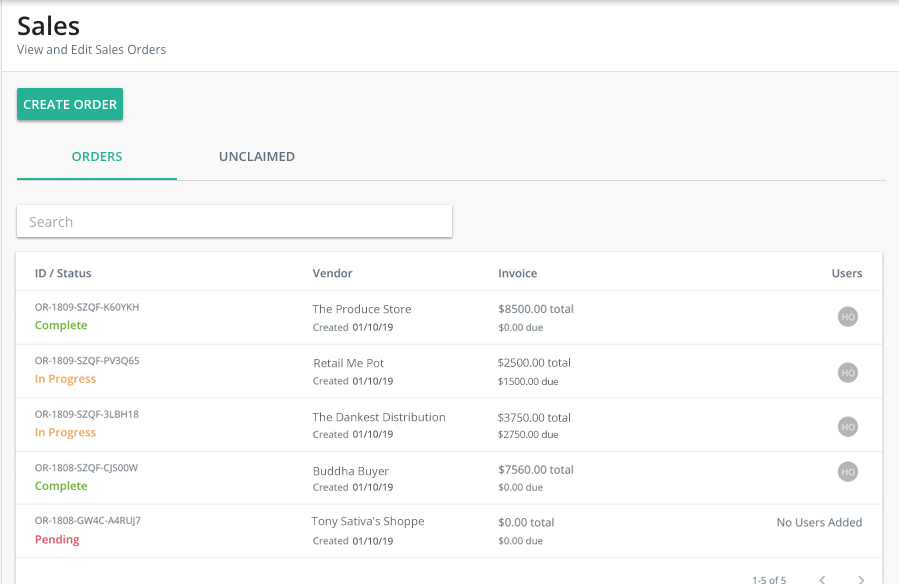
Your submitted order requests on any product are found by clicking on Purchases in the navigation menu.
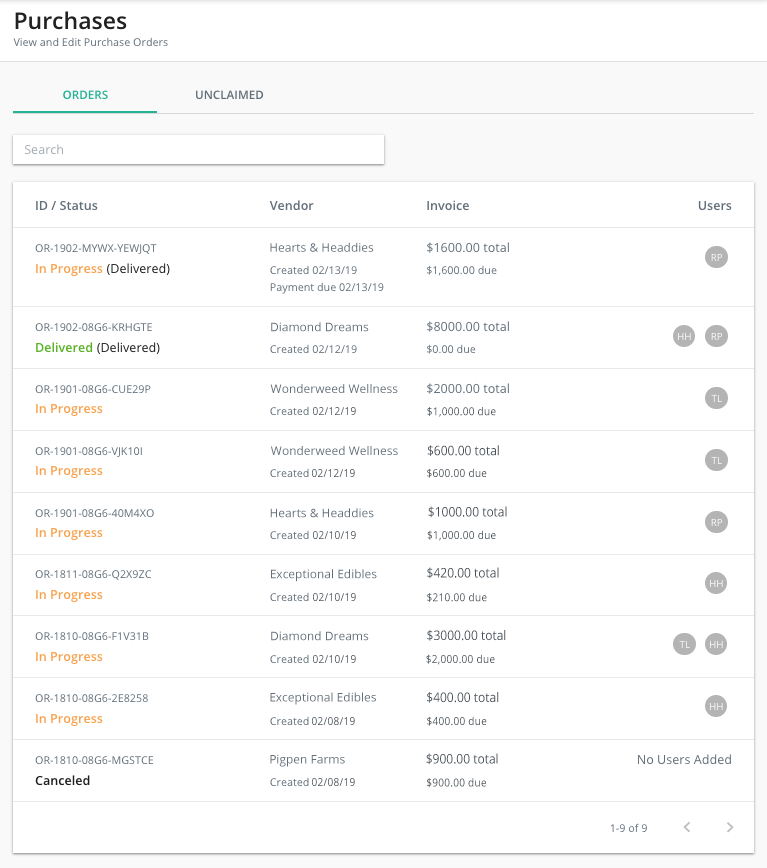
All Orders appear on the default Orders tab (shown above). Here you can see all orders, whether they are In Progress, Completed, or even Cancelled.
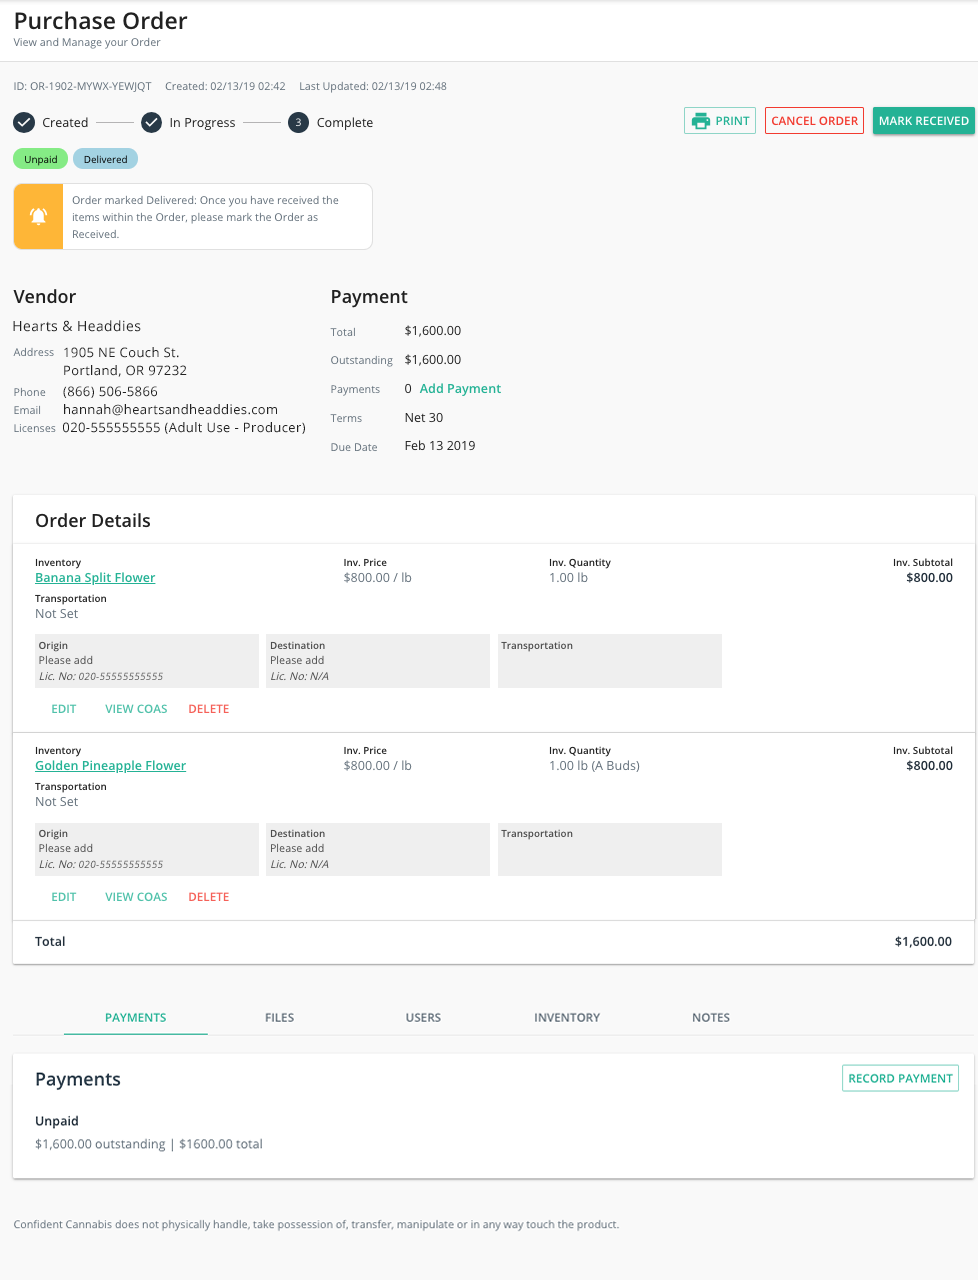
Clicking on any order will take you to the Purchase Order page, which has all the details of the order.
The Vendor Information shows the primary contact info and address for the vendor.
Payment Information shows the total of the order, what amount is outstanding, a place where you can record payments as they come in, the net payment terms, and due dates.
Below that are the Order Details. Each inventory item in the order is available in separate lines. You can add or remove any items in the order while it is In Progress. Should your negotiations result in higher or lower quantities of any item, you can always click in your order to edit it.
Every product in Wholesale is generated directly from lab results, which means users can access lab results and COAs in just a few clicks. No more having to hound your vendors, and no need to worry if you lost the one they gave you.
If you click on any In Progress or Completed order, the Inventory in the order includes convenient links to the COAs, or the product info by clicking the name.
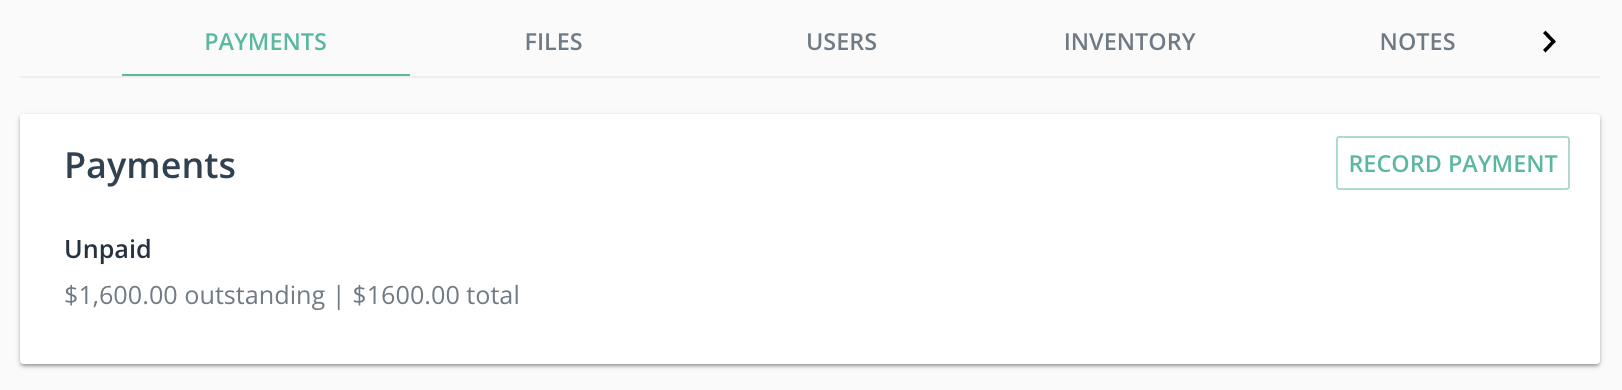
Record any income under Payments, or use the Add Payment button near the top. Make sure to include down payments and record any additional payments as they are received, to keep both parties updated.

Upload any Documents that are relevant to the order, like invoices and manifests.
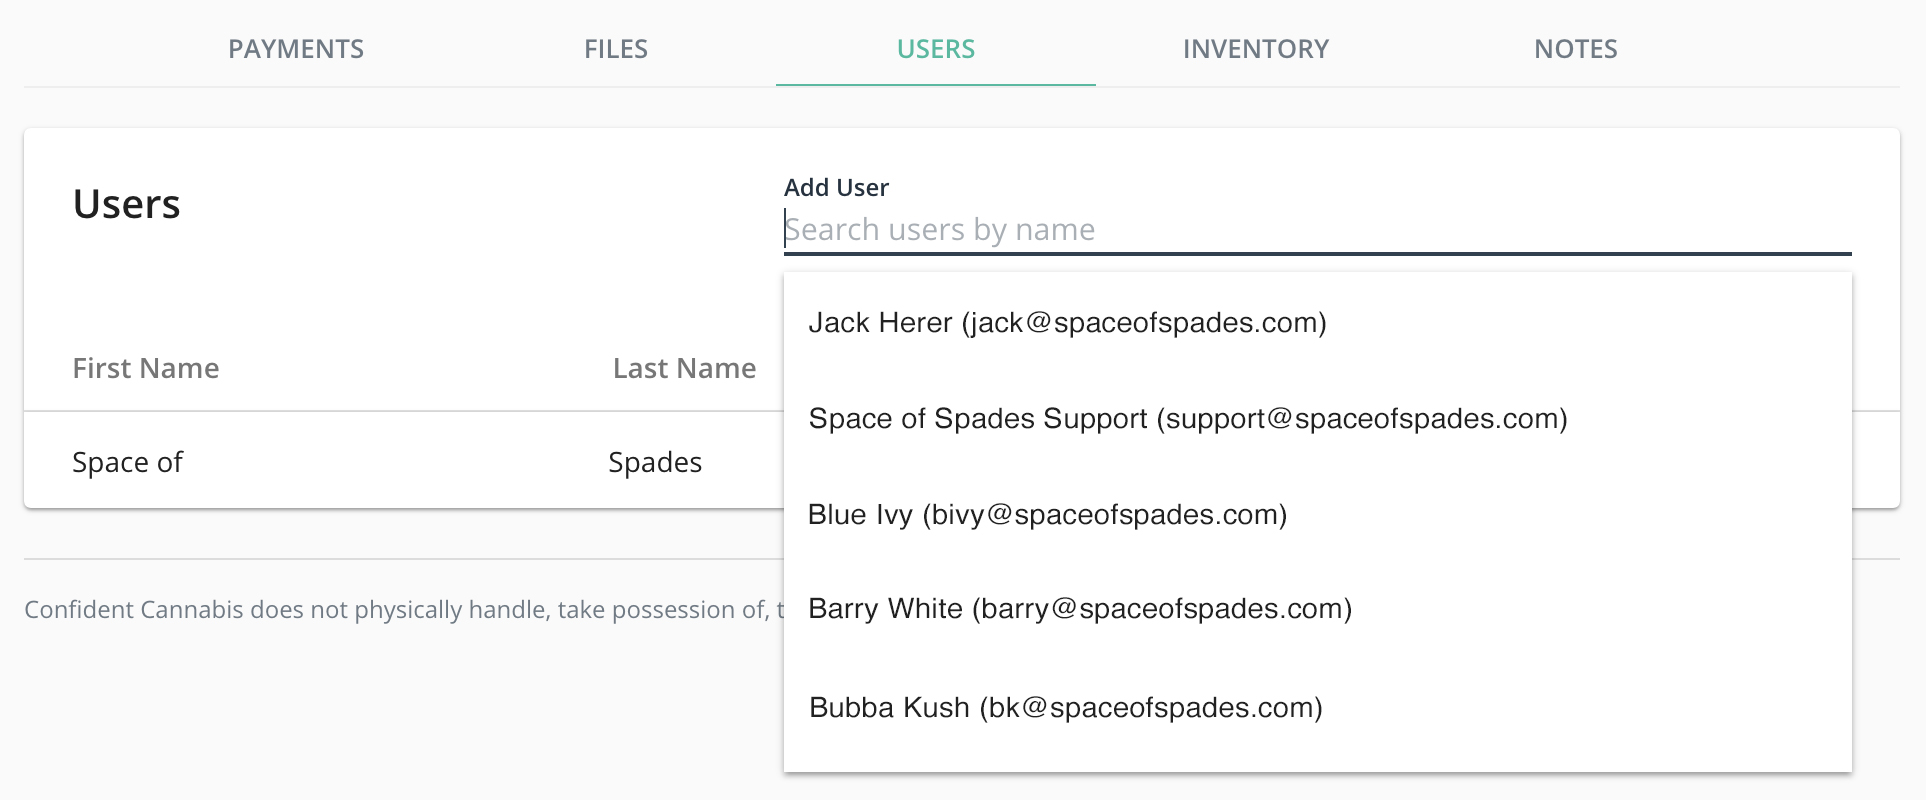
Assign any number of Users that you want to have eyes on this order to be notified of all changes.
More Inventory can be added using that tab, just like using the fields in the order above, as explained previously.
![]()
To cancel any order, just click Cancel.
Pending Orders are orders sent to a vendor that are not yet accepted.
Canceled Orders were stopped by either party and are still available to access.
You can always access Complete Orders, where you can easily print the order as an invoice or access the COAs whenever you need.
The Unclaimed tab shows you any orders that your vendors may have submitted to you that you have not accepted yet. Accepting orders from your vendors here can help streamline your purchasing process and keep you from having to live on your phone and email. When you accept an Unclaimed Order, it moves over to Orders.
View additional tutorials in this series
to learn more about exploring our Gallery and initiating orders
from the topics listed in the Table of Contents.