With Wholesale, you can initiate orders to buyers of any kind. In this tutorial, we will learn about the steps a seller can take to initiate an order with a buyer.
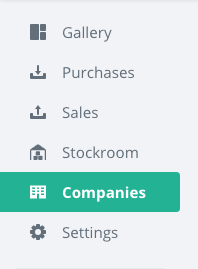
Once you log in, navigate to your list of Companies to find your current buyers and easily request new orders. If you have not transacted with a buyer on Wholesale yet, you can start a Sales Order using the Sales tab and clicking Create Order.
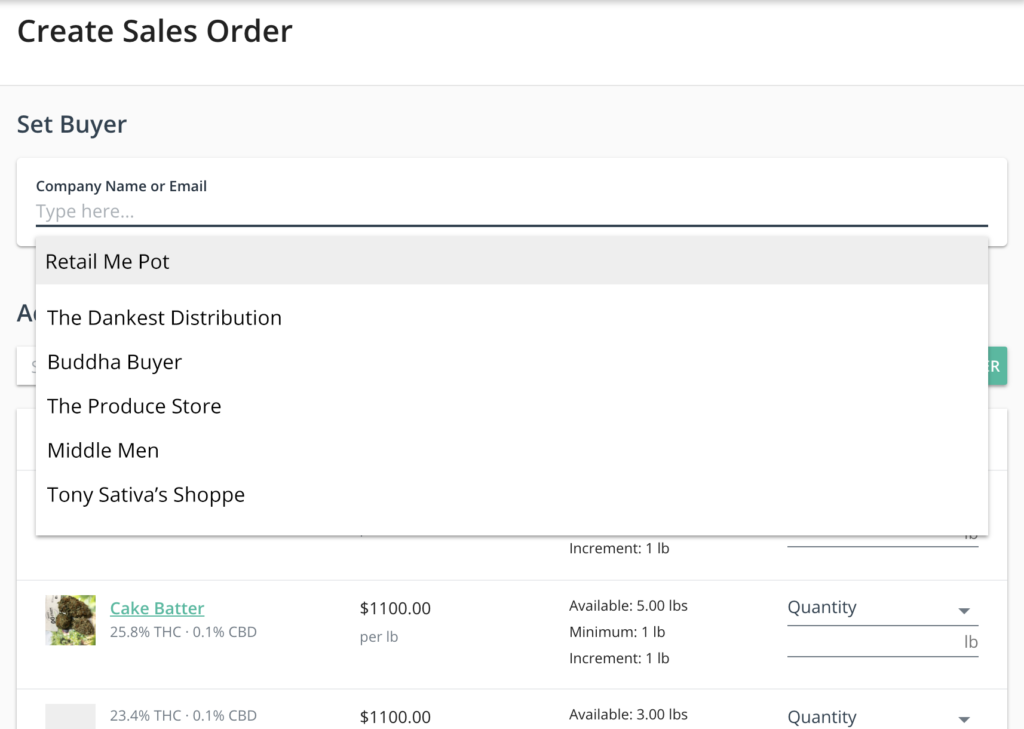
In the Set Buyer field, select existing buyer relationships using the drop-down, or add the email of your buyer manually. Make sure to use the email address that is your direct buyer contact, or one you know will reach the appropriate person efficiently.
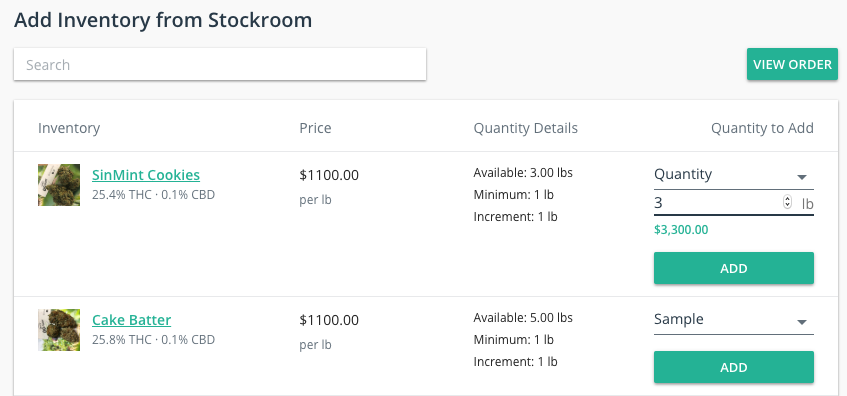
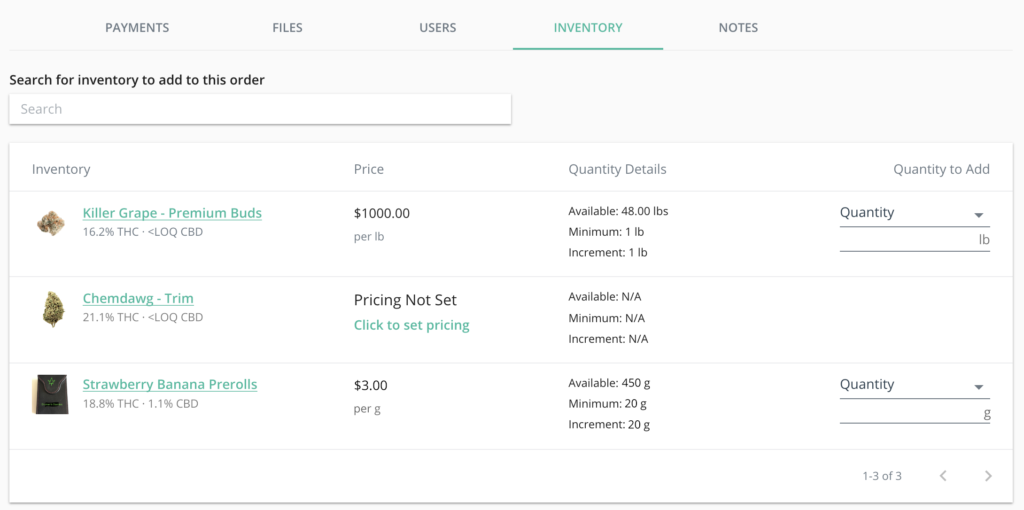
Next, select Inventory to add to your order. All available inventory on Wholesale will be listed here. Get there quickly by searching for the exact name of the inventory needed.
When you find the Inventory you want, add it to the order as a Quantity or as a Sample. For quantity, select however much of the available inventory you have left to add to the order using the Quantity fields. You can type the amount directly or use the up and down arrows to increase the amount incrementally.
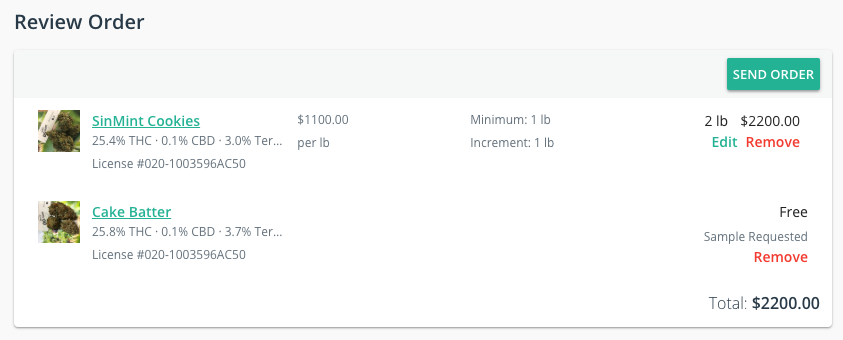
Click Add to place more inventory in the order. Each additional item will be available for review below in the Review Order section. If you made a mistake, easily edit or remove any quantity before submitting. Click Send Order when ready!
Pro Tip! After sending, reach out directly to your buyer contact to ensure they received the sales order and can act on it quickly.
Another way to send a Sales Order is to go to the Companies tab and find a buyer you have already worked with on Wholesale. Click Sales Order next to the company name you wish to send the order.
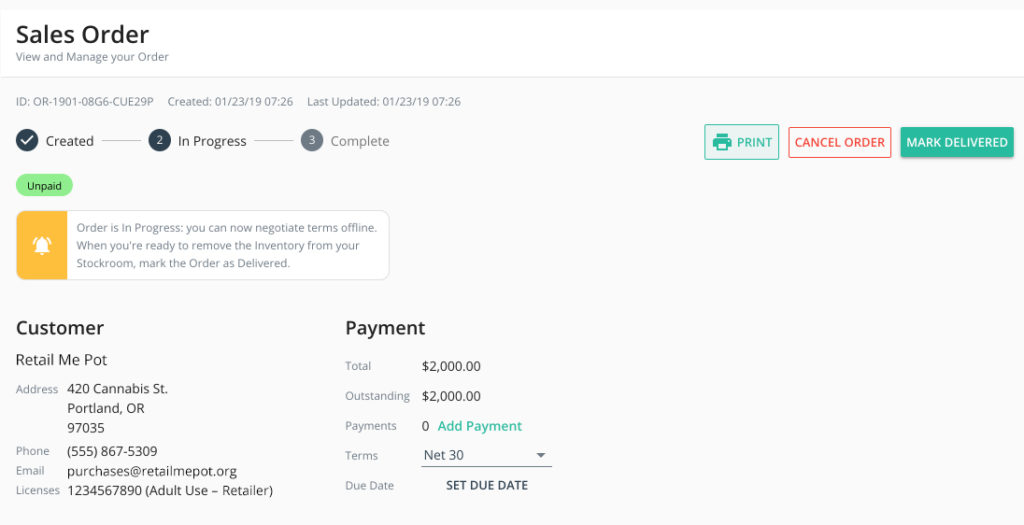
Once a Sales Order is In Progress, you can edit the order, record payments, set terms and due dates, add or remove inventory, access the COAs, add documentation, and assign users to each order.
Click on any order that is In Progress (picture above). If you already received payment, you can record it by clicking Add Payment near the top under the Payment header. Be sure to review the Payment Terms as well, and set a Due Date when applicable.
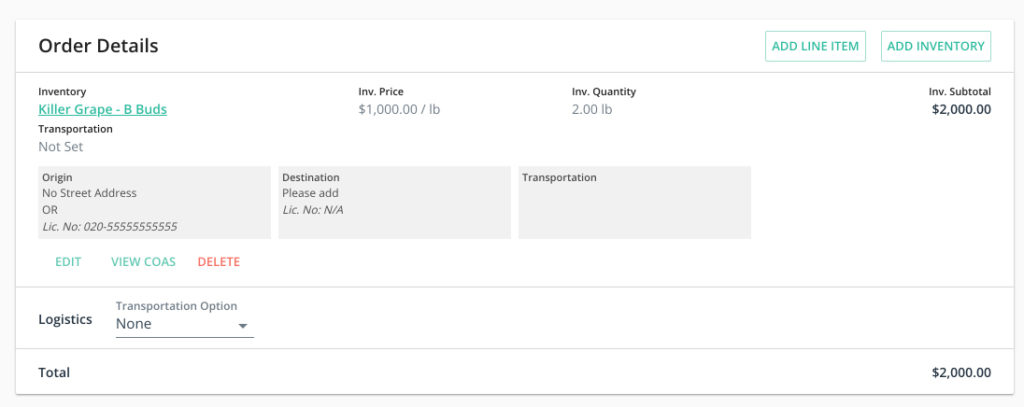
Under Order Details, make sure the Inventory included is accurate and complete. If changes are necessary, you can edit or remove the quantity of each item. Also, access the Certificates of Analysis (COAs) for every item. If any Inventory needs to be added, you can click Add Inventory to select additional items from your Stockroom. Follow the same process as you would for creating a Sales Order (explained above).
Apply a discount, or add additional items or services not associated with the lab-tested product, by clicking Add Line Item. For discounts, set a negative amount in the Amount field. This will subtract from the total. Name the line item whatever you like. You can also use this process for adding accessories, devices, or services (always use a positive amount for those!). Select any Logistics options that apply.
Under Payment, you can record any received payments by using the Add Payment button near the top. Include any down payments and record any additional payments as they are received, to keep both parties updated.
Upload any Documents that are relevant to the order, like invoices and manifests.
Assign any number of Users that you want to have eyes on this order to be notified of all changes.
More Inventory can be added using this tab, just like using the fields in the order above.
At all times, an order or orders can be printed using the Print button. This will format the order as an invoice with signature fields at the bottom for your convenience.
When an order has been fulfilled and delivered, either you or the buyer should click Mark Delivered. This will complete the order. It is ok if the final payment hasn’t been rendered yet; that can still be recorded after the fact.

